Headache Rack
Custom Headache Rack with Winch by Curt R.
I bought the winch and rack from a local store. I took it to a local welding shop and explained what I wanted. The guy at the welding shop did a fabulous job. I left him the truck, rack and winch and he had it done in one day, including painting up all the welds silver to match the rest of the rack.
I wanted something easily removed. My wife and I share the truck as she works in the oil patch (She's the OHSA officer for her company and has to travel to all their camps) and I wasn't allowed to permanently attach anything.....lol.
It had to be setup so one person could do it quickly and easily but be sturdy enough to get the job done. So, the welding shop guy first fit it to the front pockets of the box of my F150. While doing so, he welded some braces that run back from the rack along the top of the box, they're about 3" wide and I believe about 1/4" thick.

There's a support running from the headache rack to the end of the brace to give it strength. I added a brace on the left side and an elongated C-clamp to ensure the rack doesn't bounce back and forth and potentially bend the pockets, ding the truck or break the back windshield.
It's actually not likely even without the C-clamp because the pieces that go down into the pocket are bolted in. The F150 pockets have holes in them from the factory so the welding shop drilled a hole in the piece that fits into the pockets in the right place to line up with that hole, then he welded a big nut inside that piece that also lines up with both holes.
Before I drop it in place, I unscrew the 3/4" bolt out of the two posts that go into the pockets, drop the rack in place, then put the bolts back in and snug them up. That holds it in place pretty good....the C-clamp is just insurance....lol
He welded up a bracket for the winch in the middle of the rack as you can see. The winch bolts onto that bracket. I mounted the connector for the control over on the left side of the rack and ran the power wire to the right and bought a "quick connect" to join the two pieces. I added alligator type clamps on the battery end of the power cable and the other half of the quick connect to the other end. So when the hood is up, the power cable is hanging over my rear view and goes into the engine compartment and is connected to the battery.
The ramp we use is actually a piece of treated 3/4" plywood from a wood truck bed liner that was in the 05 F150 we bought some years back. It's 4' wide and 6' long and fits perfectly inside the box. I lay the winch on top and roll my "truxedo" cover shut when not actually hauling a dead animal.
The winch is a 3000 lb quad winch. I will probably sell that off and buy a 4000 or 5000 lb winch as it was straining more than I liked pulling the animal up into the back of the truck. I carry a roll of heavy poly and could have put some under the moose to ease the loading but I'm thinking in a year or two, I'll probably upgrade to a slightly larger winch.
This setup works great! If you can permanently mount the headache rack, even better. Then you could run all the electrical "hidden" too.

Above: view of left side of headache rack.
This is the mount that goes into the pocket. Notice the bolt. I leave it there until I need to use the rack so I don't lose them. There's a washer that's about 1/4' wide between the bolt and the pocket insert. That's lined up with the holes that are already in the pocket of my 2010 F150. I suspect it'll fit most any Ford made since about 2000, if not earlier. The support and brace were also added. If I'm going to be traveling over rough roads, I use that extended C-Clamp on the brace to remove any chance of the rack flopping.
When I got my whitetail buck I used it because I was way out in a field and had to do a fair bit of 4x4'ing to get to the road. The unit you see bolted to the headache rack is the control box. The black wire with the white plastic on the end is where I clip the controller onto.

Right side view of the headache rack shows quick connect plug. The other end of that electrical cable of course goes to the controller. I carry the length that runs to the battery, the controller, and the C-Clamps inside the cab of the truck.
A few views of the mount for the winch.

The crossbar, support brace and platform were all welded on at the welding shop. I left him the truck and winch so he could fit it perfectly. He did a fantastic job.


As I said, if you permanently mounted the headache rack, you could do all the wiring more or less hidden. When I get an animal, I pull out the bolts, drop the rack in the pockets, snug the bolts and drop the ramp. When I'm ready, I connect the controller, plug the electrical cable into the quick connect and run it to my battery. Start to finish, under 10 minutes and I can pull an elk, moose or deer into the truck completely alone.
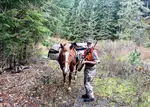
One other thing I'm going to do, is make a couple wood posts to fit in the back pockets of the truck. If I'm all alone and get an elk or moose, the plan is to do the majority of the field dressing on the ramp using gravity to my advantage. If you look back at the elk picture, I'd pull the animal into that position, tie the front legs to the posts I'm going to make using some seasoned 2x2 I have kicking around.

Everyone has their own method when it comes to gutting... me, I start at the chin and open them up to the bottom of the breastbone. Then I take my Wyoming saw and open the chest. I then cut the esophagus and basically have everything unattached from the chest cavity as far back as the diaphragm. Then I go down and around the butt and cut out the pubic bone. It's at that point I'd pull it up onto the ramp. Then all a guy would have to do is cut the diaphragm and ease the entrails out. I haven't tried it yet because I had a helper with the elk and with my whitetail buck, I just tied his legs off to the front bumper of my truck so I could take advantage of the headlights. I got him about 15 min's after sunset so it was full on dark by the time I got ready to gut him.
Want to learn how to hunt moose? Or are you wanting to increase your moose hunting skills?
Look no further!
Our moose hunting tips book is written with
not just the novice in mind, there are tips in the book that even the
most seasoned moose hunter will find of value.
The book includes 57 chapters, with more than 150 pages of information, jam packed with tips, techniques and discussions - The Ultimate Guide to Moose Hunting!
And don't forget to order one of our Fiberglass Moose Calls. In stock and ready to ship.


Good
morning Mark, I want to thank you again for your outstanding service. As luck
would have it, when I arrived home after work yesterday the moose call was in
my mail box. It figures when the Postal Circus is involved.
Ed
Manya from Tampa Bay said: My sister-in-law came down with a box of goodies from Alaska. One was a moose steak. I have thought about cooking it but didn't know how. I looked on your site. Thank you so much for having such wonderful ways to fix moose.
Laurie wrote to us:
"I just wanted to let you know how much I love
your site and how much I appreciate all the help you give everyone. I have
learned so much from this site. It is my go to guide for moose hunting. You
have a great way with words and make this site very approachable for new
hunters and very informative for both new and veteran hunters alike. Thank you
for all your hard work. Again, it's a fantastic site, keep up the great work."
Dale emailed us:
Cool website, nice to see others that consider the moose as a majestic creature. We are going to park the quads this year and use the boat, get away from the others. Will let you know if it is a successful hunt.
Recent Articles
-
BC Limited Entry Hunting – How it Works
Jun 24, 25 10:17 AM
 Limited Entry Hunting in British Columbia, updates and news. We keep you up to date with LEH News and information.
 -
Moose Walking on Knees
Mar 26, 25 02:10 PM
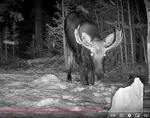 I have many hours of moose video from my trail cameras. Of course, I see moose kneeling all the time in transition to lying down or getting drinks from
 -
My Montana Moose Hunt
Dec 14, 24 06:36 PM
 First person description of a Montana Moose Hunt and the process to get a tag.