Canvas Wall Tent Review
We recently purchased a canvas tent from Deluxe Wall Tents on Vancouver Island Canada to use while moose hunting. This is our review
As a moose hunter I've always thought having an outfitters tent would be an ideal way to camp and experience the wilds of British Columbia. I've seen many moose camps with a tent set up and a woodstove pipe billowing smoke out of it. Oh that would be soooo comfortable!
I love wood heat.
Somehow sleeping outdoors in a canvas tent makes the experience that much more authentic.

After doing some research and asking a few friends about styles, fabrics and sizes we contacted Perry at Deluxe Wall Tents. Our experience during our purchase of a tent was awesome!
Right from our first question, all of the answers came quickly and fully. Perry guided us though the steps and recommended a tent size to suit our needs.
We actually made a trip over to Vancouver Island, while we were there we met Perry, got a tour of his manufacturing facility and picked up our tent... the whole experience was seamless.

The front door of the wall tent. Both the main door and screen are rolled up and secured out of the way.
What we got:
We ordered a 14X16 deluxe tent with 5 foot walls. The deluxe canvas wall tent comes with an aluminum frame (4 truss to ensure snow load strength). The aluminum frame is made from aircraft grade 6061 pipe. The fittings are all cast aluminum with machined spigots to fit the pipe.
Also included is a porch area or open vestibule. This is an awesome place to set up your kitchen and to have a place to sit out any inclement weather.
The tent includes a stove pipe jack in the wall (your choice to placement) so you don't have any leaks from the roof.
The main door is a two zippered opening with mosquito mesh that can be zipped from inside or out as well as rolled up and stored when not in use. There is a rear zippered door that is centered in the rear wall for joining more than one tent, for instance if you had two tents: one for sleeping and one for cooking.
The tent also included a floor tarp (HD plastic) and a heavy duty tarp to cover the roof to ensure your tent stays dry.
The tent also came with a drying pipe to hang clothes to dry over the woodstove. Its 1" diameter by 62 inches long with a cord through the center to hang with velcro from the trusses. We made two additional ones for hanging wet gear.
The first time we set up the tent we found the the tent a snug fit to the frame, we actually struggled with it a bit to get the tent square so we could close the zipper on the door.
Now that we've set the tent up about half dozen times we have a bit of a system figured out to make sure the zippers will close. We actually had to modify the frame.
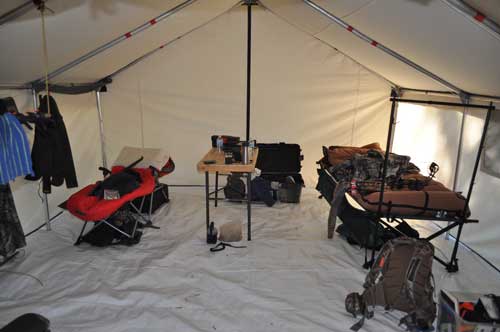
The inside of our tent. This trip was with two guys.
Modification
As per the Deluxe Wall Tent website and gathering info from others, what we found is the canvas shrinks just a little if it get wet (or damp).
What to do? Here are our steps:
- We took the frame and separated it into its categories: legs, trusses and horizontal pipes.
- Next we shortened each of the truss assemblies by 3/4 of an inch.
- Then we shortened three of the horizontal pipes by 1 1/2 inches. These three pipe we identified with white tape. When we assemble the frame we just make sure that one of each of the pipes with white tape goes into the same truss setup. That is: one on each wall and one on the ridge-line (all in the same group).
- The legs were next shortened by 3/4 of an inch each.
Now when we assemble the tent on uneven ground (its always uneven in the bush) we can fit the canvas very easily and don't struggle near as much trying to get the doors zippers so they close without a fight.
Another thing we did was to make an extension for the porch. We bought some extra fittings from Deluxe Wall Tents and went to the local metal store and bought some pipe. Our extension adds another six feet to the kitchen area and when its completely tarped in (we just used some nylon tarps) the area is easily heated by the woodstove in the tent and creates a very cozy area during bad weather.

Watch our walk though video on YouTube to see what I mean.
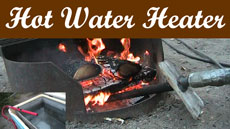
Woodstove
You can't camp in a wall tent without a woodstove... can you? Well, we don't think so.
We setup a nice little woodstove to keep us warm and dry out the gear that got wet. Boy, did we get wet this year too. We were so grateful to have the stove to dry everything out.
It's really nice to put on warm socks on a chilly morning. Just hang them over the wood stove the night before.
The bottom line?
This tent is unbelievable in comfort and style. Our hunting party was more than accommodated and comfortable in this wall tent.
A 14X16 tent is really too big for 2 guys, just right for 4 guys and will be a bit crowded with 6. You'll have to figure out how much space you need for your group of moose hunters and all their gear.
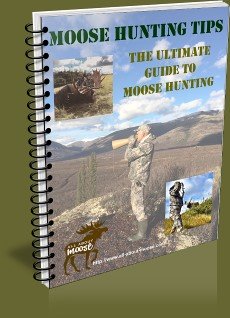
Want to learn how to hunt moose? Or are you wanting to increase your moose hunting skills?
Look no further!
Our moose hunting tips book is written with
not just the novice in mind, there are tips in the book that even the
most seasoned moose hunter will find of value.
The book includes 57 chapters, with more than 150 pages of information, jam packed with tips, techniques and discussions - The Ultimate Guide to Moose Hunting!
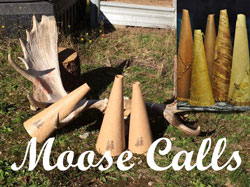
And don't forget to order one of our Fiberglass Moose Calls. In stock and ready to ship.
Top of the Wall Tent Page
Return to the Moose Hunting Supplies Page
Return to All About Moose Home Page

Good
morning Mark, I want to thank you again for your outstanding service. As luck
would have it, when I arrived home after work yesterday the moose call was in
my mail box. It figures when the Postal Circus is involved.
Ed
Manya from Tampa Bay said: My sister-in-law came down with a box of goodies from Alaska. One was a moose steak. I have thought about cooking it but didn't know how. I looked on your site. Thank you so much for having such wonderful ways to fix moose.
Laurie wrote to us:
"I just wanted to let you know how much I love
your site and how much I appreciate all the help you give everyone. I have
learned so much from this site. It is my go to guide for moose hunting. You
have a great way with words and make this site very approachable for new
hunters and very informative for both new and veteran hunters alike. Thank you
for all your hard work. Again, it's a fantastic site, keep up the great work."
Dale emailed us:
Cool website, nice to see others that consider the moose as a majestic creature. We are going to park the quads this year and use the boat, get away from the others. Will let you know if it is a successful hunt.
Recent Articles
-
BC Limited Entry Hunting – How it Works
Jun 24, 25 10:17 AM
 Limited Entry Hunting in British Columbia, updates and news. We keep you up to date with LEH News and information.
 -
Moose Walking on Knees
Mar 26, 25 02:10 PM
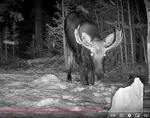 I have many hours of moose video from my trail cameras. Of course, I see moose kneeling all the time in transition to lying down or getting drinks from
 -
My Montana Moose Hunt
Dec 14, 24 06:36 PM
 First person description of a Montana Moose Hunt and the process to get a tag.